
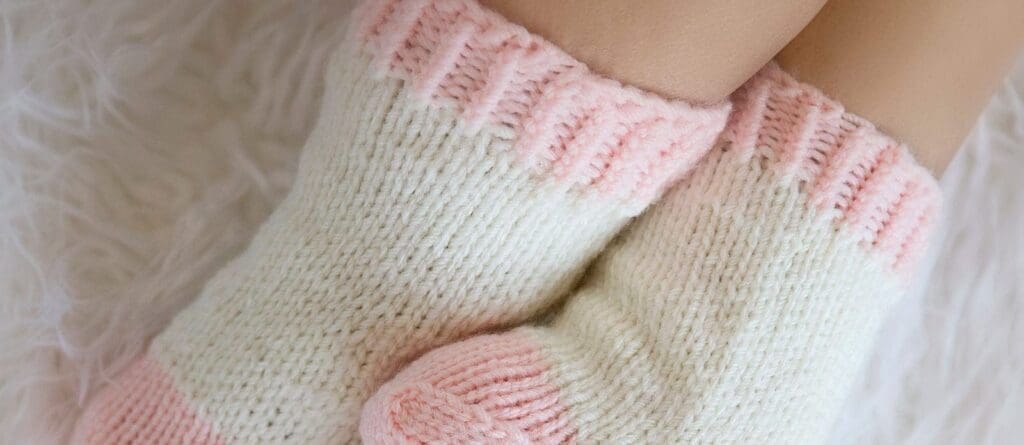
Cozy Slipper Socks Knitting Pattern
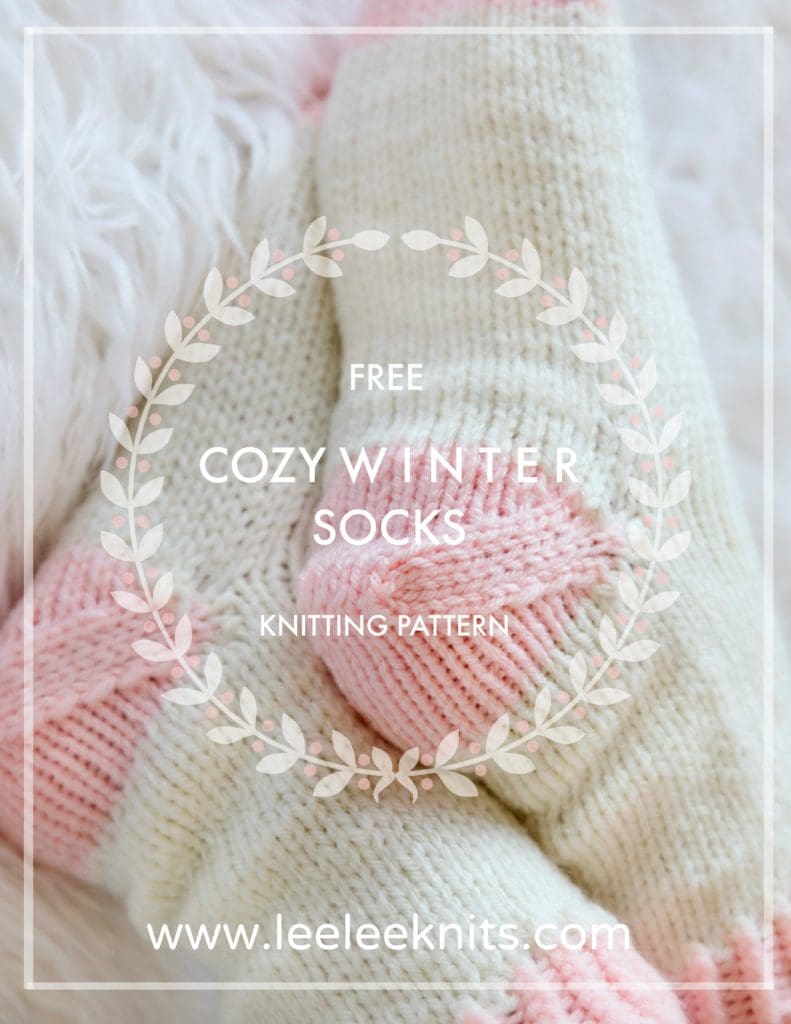
Thick Cozy Knit Slipper Socks Made Easy
I have been hoping to post a sock pattern for such a long time! I love hand knit socks so much – there’s nothing cozier than soft, custom sized socks to keep your toes warm in the cold winter months. The pattern I am posting today is for an extra thick and warm pair of slipper socks – sometimes called cabin socks or reading socks.
Pin It for Later!
I hope you enjoy this pattern! Please feel free to share the link to this page on your social media or Pinterest account.
I truly appreciate all of you who get the word out about this site and my patterns!
❤️ Alnaar
These socks are made with bulky weight yarn so they knit up super quick too. I chose to use Paintbox Yarns Simply Chunky yarn for a couple of reasons. First, I wanted a durable acrylic yarn that would be easy to wash. Second, this yarn is the softest acrylic yarn I know of. My feet are sensitive and I hate the feel of scratchy material – which makes this yarn the perfect choice.
I knit my socks from the toe up, using the magic loop method with circular knitting needles. I have tried to write out the pattern so that those of you who prefer double pointed needles can easily modify it.
Please note that some of the links below are affiliate links and I will earn a commission if you purchase through those links. I use all of the products listed below and recommend them because they are companies that I have found helpful and trustworthy. Please let me know if you have any questions about anything listed below!
Slipper Socks Knitting Pattern
What You’ll Need to Knit These Warm Socks:
- Size 7 (4.5mm) circular knitting needles
- Paintbox Yarns Simply Chunky yarn:
- Colour A – Ballet Pink (90 yards)
- Colour B – Champagne white (149 yards).
- Scissors.
- Yarn Needle.
- Ruler or tape measure.
- Detachable stitch marker.
Ad Free PDF File
The free knitting pattern for these cozy socks is available right here on this page, as this site is sustained through ad support.
If you like things a little more streamlined, I’ve put together an ad-free, downloadable PDF version of the pattern. It’s perfect for easy printing and can be can be purchased through My Ravelry Store or by clicking the “Purchase PDF File” button to the right.
Thank you so much for your support! It means the world to me, and I’m beyond grateful to be able to share my passion with you all.
Gauge
4.5 stitches, 6 rows = 1″ in stockinette stitch.
Knitted Sock Size:
These knit slipper socks are made to fit an adult lady’s feet. Length of foot can be customized in pattern.
Abbreviations:
K: Knit
P: Purl
K2Tog: Knit Two Together decrease
SSK: Slip, Slip, Knit decrease
Kfb: Knit Front and Back increase

Notes:
These socks are knit from the toe up, using the Magic Loop technique and circular 32″ knitting needles. If you prefer, you can alter the pattern for double pointed needles.
You will need to know the following techniques to knit these socks. If you do not know these techniques, please follow the links and read/watch the tutorials before you begin.
- Judy’s Magic Cast On
- Russian Bind Off
- Magic Loop Technique for knitting in the round
- Placing and Picking up Stitches for an Afterthought Heel
- Kitchner Stitch
Pattern:
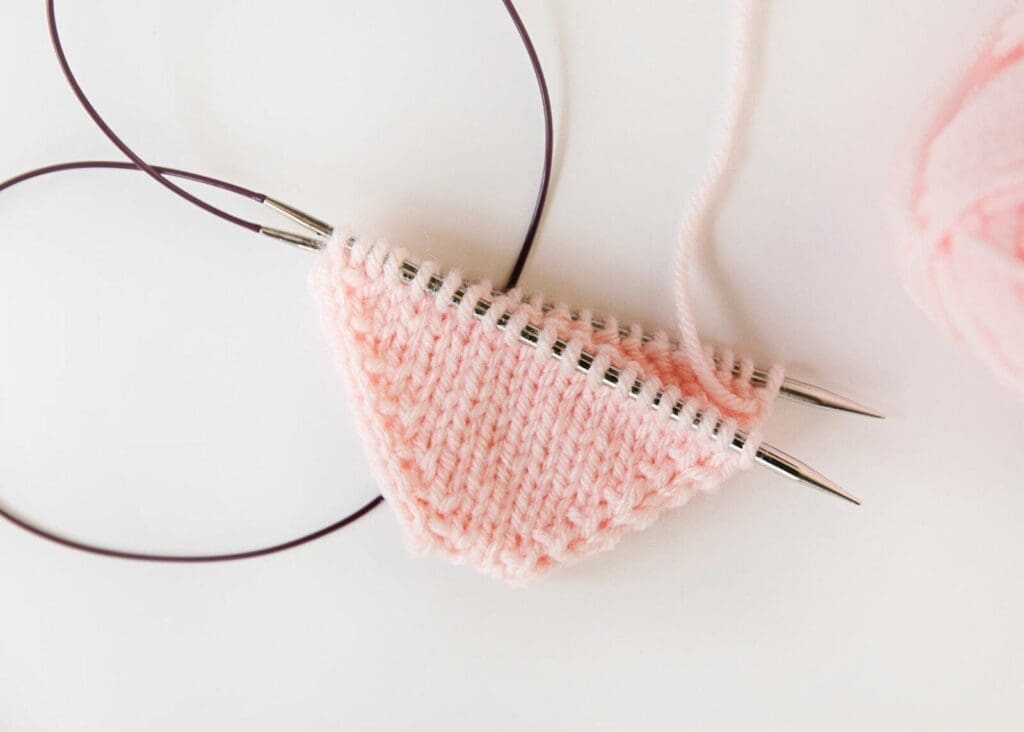
Toe:
With Colour A and using Judy’s Magic Cast On, cast on 10 stitches (5 stitches on each needle) to begin knitting your sock.
Round 1:
On each needle: K1, kfb, knit to last 2 stitches, kfb, k1 (increased a total of 4 stitches). Place a stitch marker to mark the beginning of each round.
Round 2:
On each needle: Knit each stitch.
Repeat rounds 1 and 2 until you have a total of 19 stitches on each needle (total of 38 stitches). Your slipper sock should look like the photo below at this point.
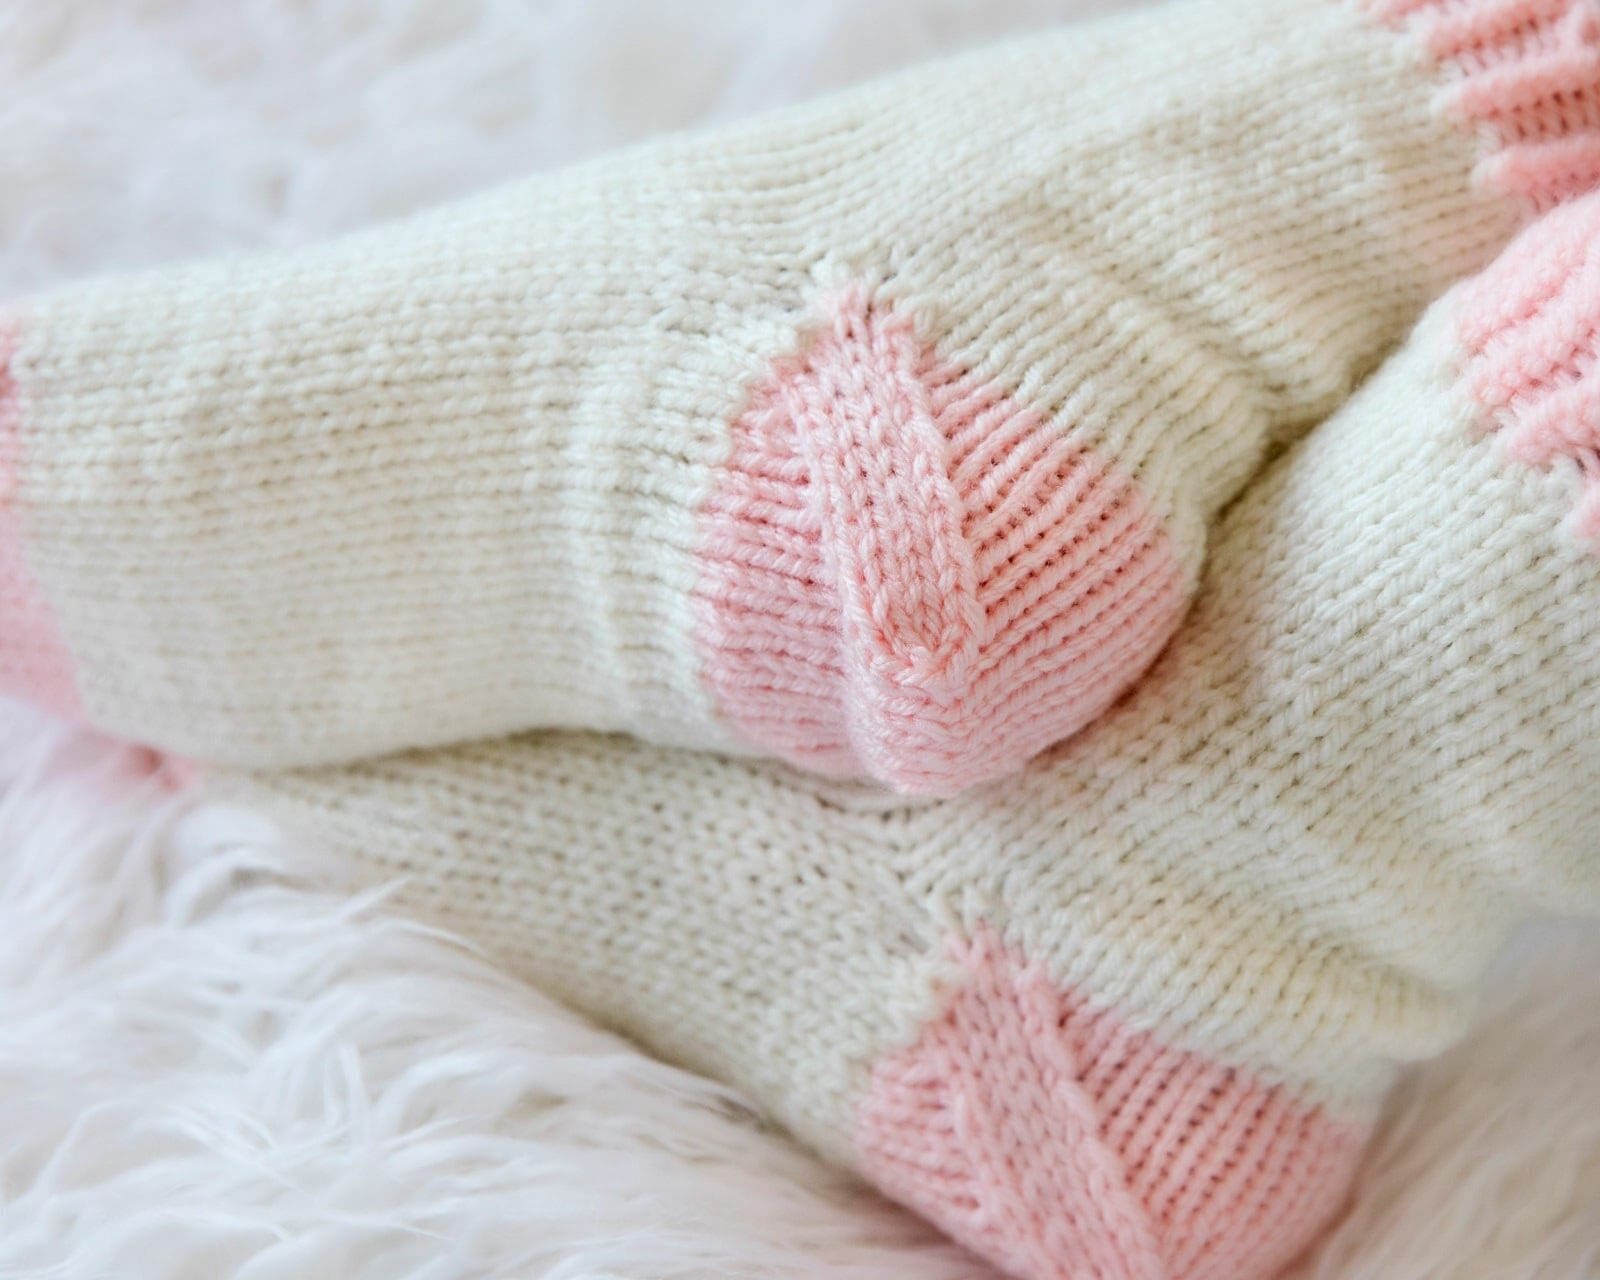
Foot:
Switch to Colour B and knit every round until your work measures 2 inches less than the length of the foot (length of foot is from top of toes to end of heel). The remaining two inches will be made up when you work the heel. For example, my feet measure 9.5 inches so I work the foot until the total length of the sock is 7.5 inches long (including the toe part).
Sock Heel Placement:
This pattern uses the afterthought heel technique. This requires using some waste yarn to hold the placement of the heel so that the rest of the sock can be completed before coming back to finish the heel.
To place the afterthought heel, continue to knit across Needle 1 (top of the foot).
The stitches on Needle 2 are the second half of the stitches for the bottom of the foot. This is where we use the waste yarn to hold the heel stitches until we can come back to work the heel. Let go of your working yarn (leave it attached) and knit with the waste yarn across Needle 2. Turn your work and purl back to create another row, and then turn and knit one more row so that you have 3 rows with the waste yarn to hold the stitches for the heel. Cut your waste yarn, leaving a bit of a tail.
The stitches must now be transferred back to the left needle so that you can continue to work in the round. Slip each stitch back onto left needle and pick up the working yarn. Knit across Needle 2 to complete the round. You now have one round complete that holds the stitches for the heel and can continue on to work the leg of the sock.
Leg:
Knit every round until you have completed 4 inches for the leg. Continue to Cuff.
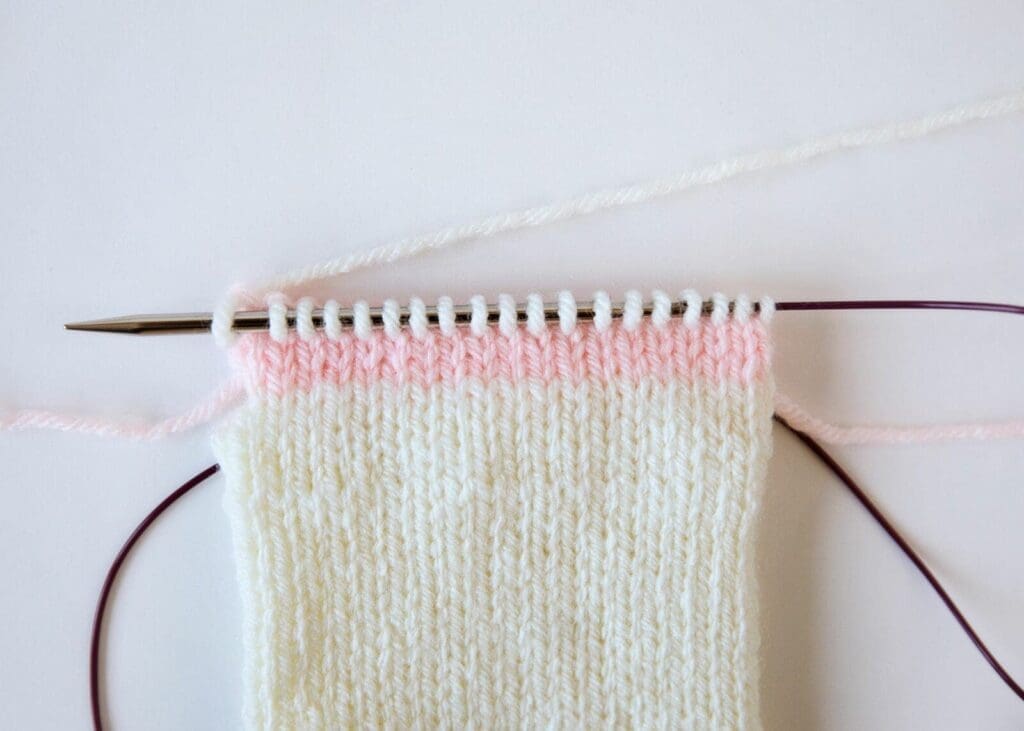
Cuff:
Work 10 rounds of K1, P1 ribbing. Bind off in pattern using Russian Bind Off technique.
Heel:
Hold the sock so that the toe end is facing you, and the cuff is facing away from you.
Pick up the stitches back onto your needle by inserting the needle under the front leg of each stitch directly under or over the waste yarn stitches. Carefully remove the waste yarn. Once you have picked up each stitch, you will notice that there is a gap on each end. See photo below.
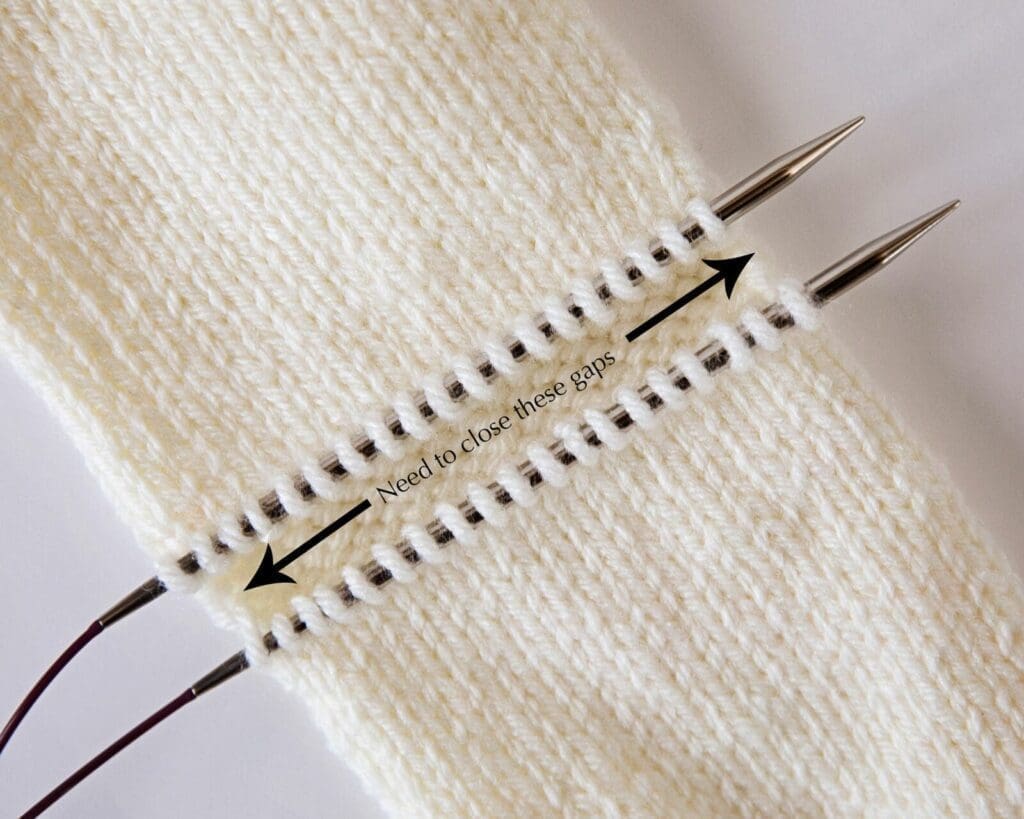
To close the gap, you will need to pick up two extra stitches.
With Colour A, starting on the bottom needle, insert the free needle into the centre of the stitch one stitch down from the stitches on the top needle and through the strand connecting the last stitch to the top needle. Knit these two stitches together to create the first extra stitch. Insert the needle into the next stitch in the gap and the stitch connecting the first stitch to the bottom needle and knit the second extra stitch. See photos below for what your work should look like.

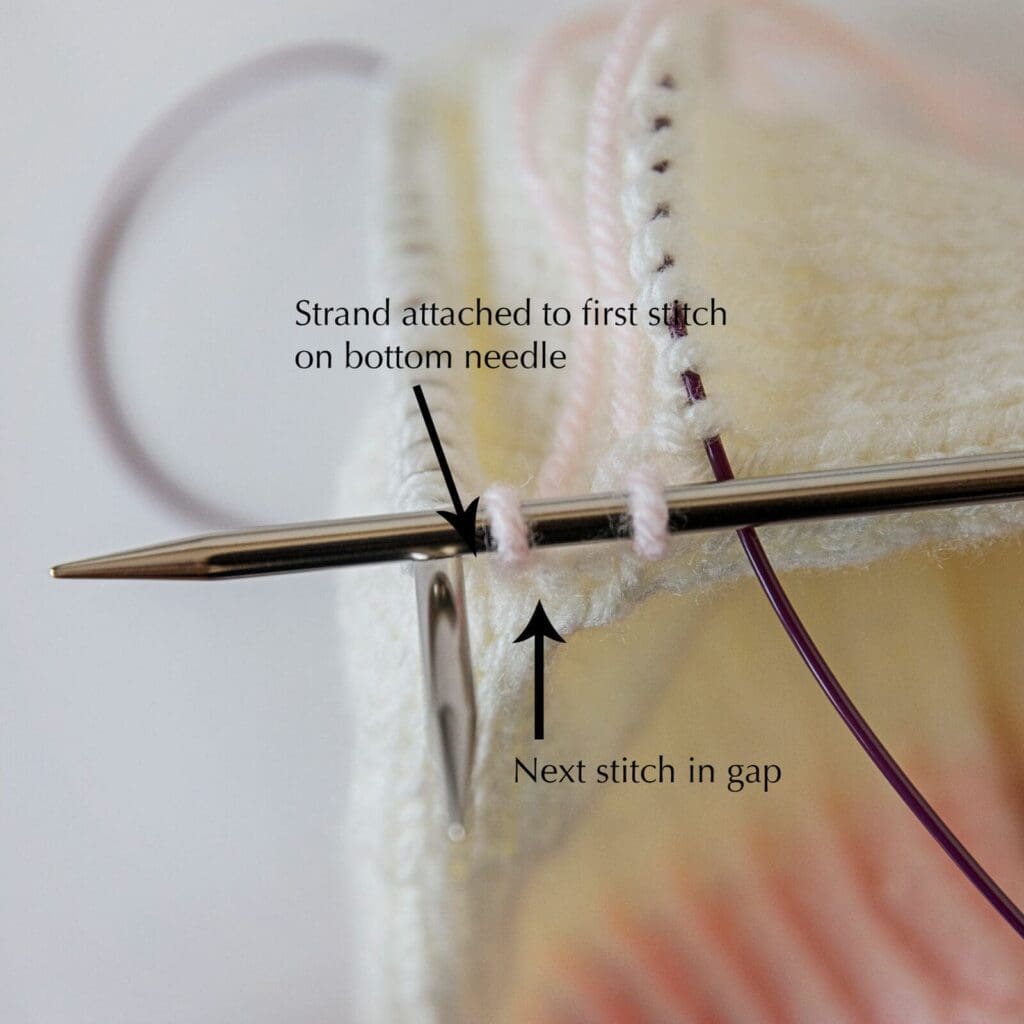
Knit across the bottom needle. You will have 21 stitches on the needle.
Repeat the above steps for Needle 2 so that you have 21 stitches on Needle 2 and a total of 42 stitches.
Now that we have closed the gap, we can decrease the extra two stitches in the next round.
Needle 1: K2Tog, K2Tog, Knit the remaining stitches (19 stitches).
Needle 2: K2Tog, K2Tog, Knit the remaining stitches (19 stitches).
We can now work on shaping the heel.
Round 1:
On each needle: K1, SSK, knit to last 3 stitches, K2Tog, K1 (decreased a total of 4 stitches).
Round 2:
On each needle: Knit each stitch.
Repeat rounds 1 and 2 until there are 7 stitches remaining on each needle (total of 14 stitches).
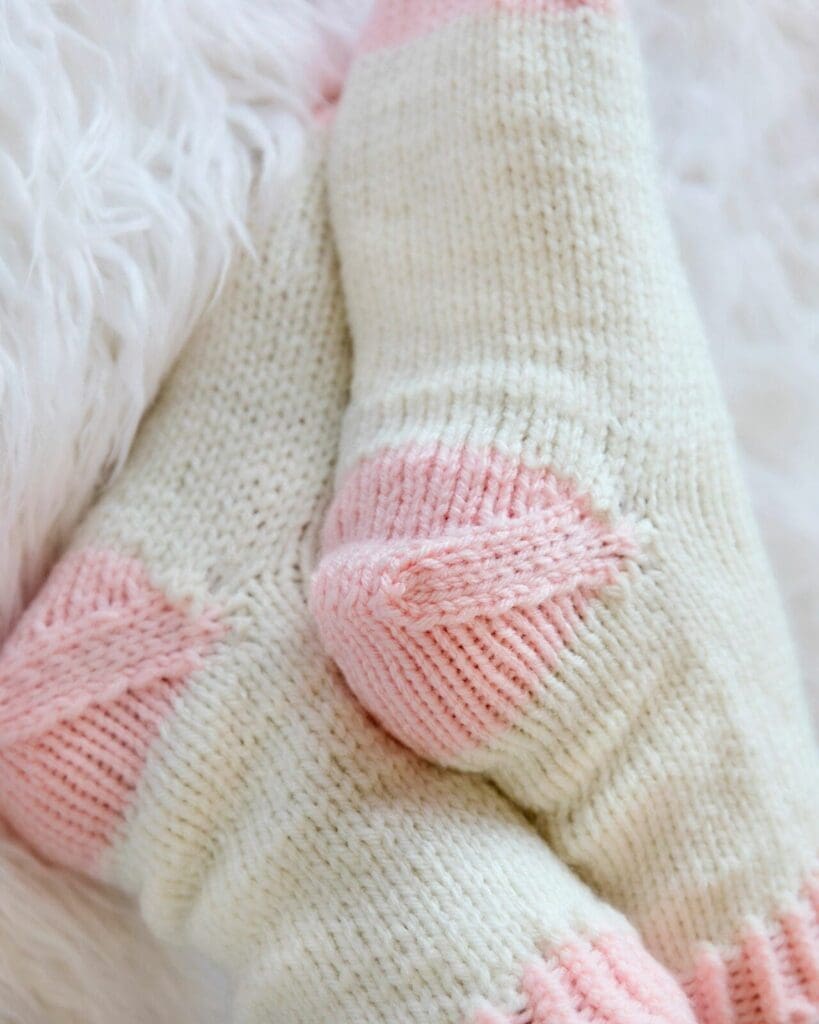
Cut the yarn leaving an 8-10 inch tail and graft the stitches together using the Kitchner Stitch. Secure and weave in all loose ends.
Repeat for the second sock and you have a pair of comfy cozy socks to keep you warm all winter long.
Pattern PDF File
I hope you enjoyed the free knitting pattern for these cozy socks.
If you’d like your own copy, the Ad-Free PDF file (which will be emailed to you automatically) can be purchased through Ravelry, or by clicking the “Purchase PDF File” button to the right.
Thank you so much for your support! It means the world to me, and I’m beyond grateful to be able to share my passion with you all.